Fun With Effects
I'm in the mood for something 'groovy' to lift the tension.
Layer Styles can take you a long way these days, but for
combining effects (adding metal to glass, for instance) you
need to work with more than a single layer. You will also
want to work with some filter options for added texture. All
the steps I'm taking here are actionable, I'm including the
action with this column for you to enjoy. Let's get started!
1) Make a new image. Background doesn't matter, but you may
want to go with white or transparent. Mine is a transparent
image, 100 DPI, RGB.
2) Create a new layer.
3) Choose the Type Mask Tool, and enter your text in the new
layer with a font size of at least 120. For this example I'm
using 'PizzaDude Pointers', found at
http://www.pizzadude.dk/home.html . If you've never
visited this site I strongly recommend it, especially if you
are into original fonts.

4) Fill the selection with a color; white
should work just fine.
5) Create a new layer.
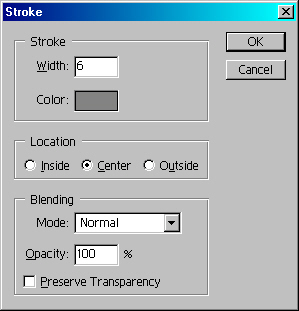
6) Choose Gray as your foreground color. Go to Edit>Stroke.
Apply a centered 6 pixel stroke.
Here's the example thus far:
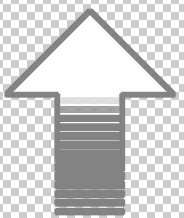
7) Since we are already on the stroked
layer, let's work with that guy first. Command/CTRL+Click
the stoke layer in the layers palette to make our stroke an
active selection. Let's duplicate this layer just in case.
8) Hit 'D' to reset your colors. We don't really want a
stark black foreground, so let's change that to an extremely
dark blue/black. We just need a hint of color, so don't get
too bright!
9) Select the gradient tool. We want to go Foreground to
Background, Refelected Gradient Style, fill mode set to
Difference.

10) Start filling the selection several
times from different angles.
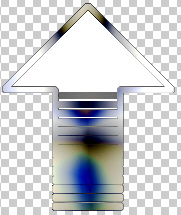
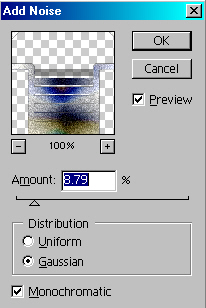
11) Let's add a bit of noise to the
selection:
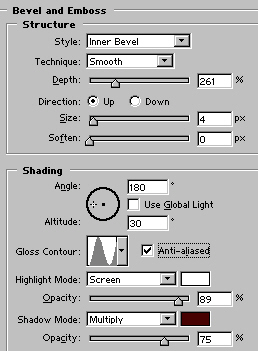
12) Now just a little bevel to give us some
dimension and reflection:
Let's move down to the filled layer and work
on the gloss. What gloss? You'll soon see!
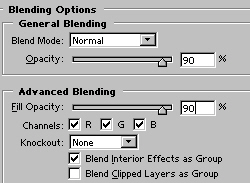
13) With the filled layer selected (as
opposed to the stroke layers), open the Layer Style dialog
box. Choose 'Blending Options' from the top of the left hand
menu. We will change a couple settings here:
14) For the next few steps, we will just
walk through Layer Style Settings:
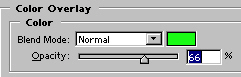
First some Color:
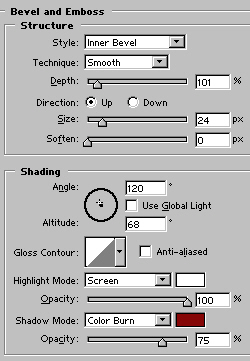
A Bevel:
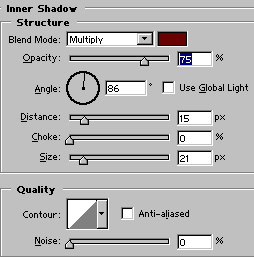
Inner Shadow:
Inner Glow:

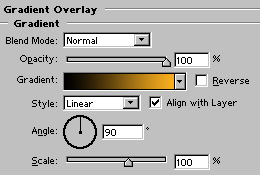
And finally, a Gradient Overlay:
That seems like a lot of steps, which is why
you should save this as a Layer Style if you would like to
apply it again in the future. After all that, here is the
result:

I threw a bit of background in to show that
the glass is, indeed, somewhat transparent.
Let's run the action I created on some other
text, just to make sure everything works:

Looks like everything is in order! Thanks
for taking a few minutes out of your week to spend with me,
and please come see me at Action Fx. Take Care!
|