Masks and Selections (Part 3 of 3)
Over the past couple of
columns, we've looked at selections and masks � what they
are and how they work. This week, we'll explore creating and
editing masks by working with the various tools and commands
that allow you to take advantage of all 256 levels of
"masked."
To start, let's create a practice file that
we'll use throughout these exercises. (It will be easier to
follow these exercises if you first open the Preferences>
Units & Rulers, and set the Ruler unit of measure to
pixels.) Open a new Photoshop document, 350 pixels by 350
pixels, 72 pixels per inch, RGB color mode, filled with
white. In the Layers palette, click on the New Layer button.
Now open the color palette and change your foreground color
to R:255, G:255, B:0. Use the Paint Bucket to fill the new
layer with this yellow. Next, use Filter> Noise> Add Noise.
Use the settings 150%, Uniform, and make sure that
Monochromatic is checked. Your image and Layers palette
should look like those pictured here.

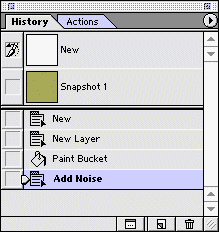
Next, pop up to the History palette and
click on the New Snapshot button at the bottom of the
palette to create Snapshot 1. We'll be starting over
regularly during these exercises ... but there's no need to
got all the way back to a blank file. The History palette
should look like this:

For the first exercise, select the
elliptical marquee tool in the Toolbox. In the Options Bar
(Photoshop 6) or the Options palette (Photoshop 5 & 5.5),
set Feather to 0 and uncheck the anti-alias option. Elect
the Constrained Aspect Ratio option and make sure that it is
set to Height 1, Width 1.
Drag a circular selection. With the rulers
visible, I dragged from 50,50 to 300,300. You don't need to
be precise � any circular selection that covers a large area
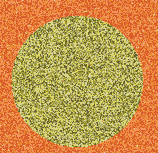
of the canvas is fine. Now press Q on the keyboard or click
the Quick Mask Mode button at the bottom of the Toolbox. In
Quick Mask mode, the image should look like this:

You see that the selection has defined a
mask. The mask has crisp, sharp edges, as seen by the
definite break between the red overlay and the unprotected
area of the image. A close-up:

If you zoomed in, return to 100% zoom. Exit
Quick Mask mode by pressing Q on the keyboard or clicking
the Standard Mode button in the Toolbox. Use the command
Select> Deselect or press Command-D (Mac) or Control-D
(Win). Go to the Options Bar or palette and add feathering
to the Elliptical Marquee. Type in 25 (or, if your unit of
measure for the rulers is not pixels, type in 25 px). Drag
the same circular marquee as in the previous example. Again,
enter Quick Mask mode. Your new mask should appear similar
to that shown here:

We'll zoom in to 500% again. Compare the
earlier zoom with this one. Notice, first, that rather than
a sharp, clean division between masked and unmasked, the red
overlay fades. Looking at the rulers visible in each image,
you'll see that the same area of the canvas is shown.

If we return to 100% view, exit Quick Mask
mode, and hit Delete, the selection's feathering (shown in
the mask as the gradual fade) results in partial deletion of
some pixels.

Now that the relationship between selections
and masks has been reinforced, let's make some masks from
scratch. In the History palette, click on Snapshot 1 to
return the image to the state seen above in the first
figure. (You should have two layers, one filled with yellow
with added noise.)
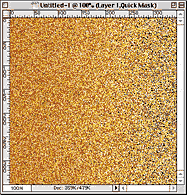
Enter Quick Mask mode. Press D on the
keyboard or use the icon in the Toolbox to return your
colors to black and white. Select the Gradient tool and, in
the Options Bar or palette, choose a black-to-white linear
gradient. Drag the gradient from left to right. You'll
create a mask similar to the one shown by the red overlay
here:

Exit Quick Mask mode and look at the
resulting selection. Observe that it seems to encompass only
half of the image. The pixels contained within the selection
marquee are selected at least 50% � whatever filter or
command is applied will be at least 50% effective on those
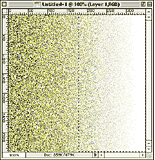
pixels. Let's see what happens when we hit Delete.

Note that, like the feathering seen earlier,
the deletion is only partially applied to some pixels.
Return to Snapshot 1 in the History palette and enter Quick
Mask mode again. Use the Lasso tool to drag a selection.
With the foreground color still set to black, use the Paint
Bucket to fill the selection. Drag the Eraser tool across
the middle of the selection. The mask may (or may not) look
similar to this:

Exit Quick Mask mode and hit Delete. You'll
get an image comparable to this:

Again, click on Snapshot 1 in the History
palette and enter Quick Mask mode. Use the Paint Bucket to
fill the image with the red overlay. Apply the command
Filter Render> Clouds. Exit Quick Mask mode and hit Delete.
Your clouds are likely to differ from these, but the general
idea is the same � the filter was applied to the mask,
changing the way in which the mask created a selection.

Snapshot 1; Quick Mask mode � back to our
original test image. Use the Paint Bucket to fill the image
with a mask. Next, Filter> Noise> Add Noise. The settings
should still be those we used earlier. Click OK. Filter>
Blur> Motion Blur. Set the angle to 0 degrees and the
distance to 9 pixels. Click OK. Filter> Stylize> Emboss. The
Angle can be 135 degrees, the Height should be about 10
pixels, and the Amount can be set to 300%. Click OK. Exit
Quick Mask mode and hit Delete. Press Command-H (Mac) or
Control-H (Win) to hide the edges of the selection to get a
better look at the result.

Press Command-Z (Control-Z) to Undo.
(Remember that the selection edges are hidden but the
selection remains active.) Apply Filter> Blur> Motion Blur,
using the settings Angle: 34 degrees, Distance: 30 pixels.
Notice that the areas outside the selection borders are
untouched, while the Motion Blur has been applied with
varying effect in the rest of the image.

Return yet again to Snapshot 1 and enter
Quick Mask mode. Use the Paint Bucket, with the foreground
color still set to black, to fill the image. Filter>
Stylize> Tiles is what we'll use next. Set the number of
tiles to 10, the maximum offset to 10%, and elect to fill
with the background color. Click OK. Next, head for Filter>
Sketch> Bas Relief. The setting should be Detail: 7,
Smoothness: 5, with the light coming from the top left.
Click OK. Exit Quick Mask mode. Choose Filter> Pixelate>
Crystallize. Pick a cell size of 50. Click OK.

Hide the edges with Command-H (Control-H),
and notice how, yet again, the mask has protected some
areas, while allowing the rest of the image to be filtered.
In the course of these exercises, we've
created masks starting with selections and from scratch.
We've used selection and painting tools to edit the masks.
We've applied filters to create masks. We've ended up with
some pretty strange looking creations ... but creations that
show how masks work. You should now be perfectly comfortable
jumping into and out of Quick Mask mode, and you should have
a good grasp of the relationship between masks and
selections.
|