Burnt Wood in Photoshop
I've received a few requests to
do something about burning material. Today I'm going to
create a burned wood effect. Most of this can be
accomplished just using Photoshop, but later in the tutorial
I'm going to get some help from Eye Candy 4000.
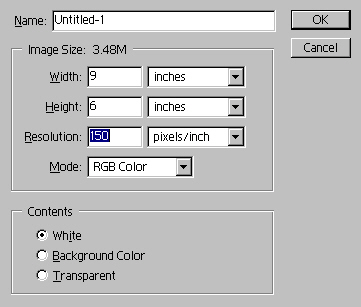
1. Let's start with a new image.
2. Create a new layer.
3. Select a light brown/tan for the foreground color, and a
darker brown for the background.

4. Select the Reflected Gradient and fill
the new layer from the center to the bottom.
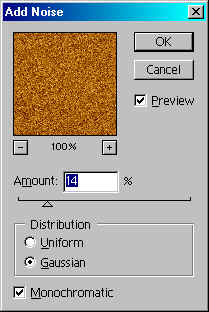
5. Let's add a bit of noise:
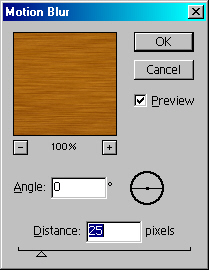
6. Now for a motion blur:
7. If you like, you may want to bring up the
Brightness/Contrast and do some adjusting. Tweaking the
contrast will give your wood a richer, deeper color.
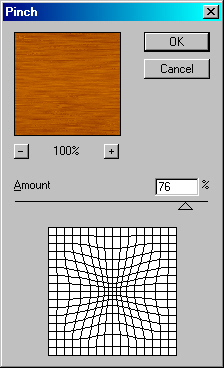
8. Select the magic wand tool and set the
tolerance to 15. Click an area in the wood grain to bring up
a jagged selection. Go to Filter>Distort>Pinch to give the
selection some 'warp'.
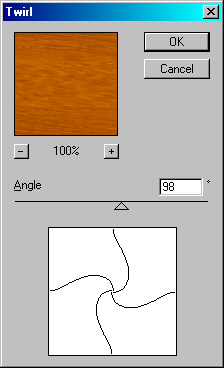
9. Now go to Filter>Distort>Twirl:
10. Now enter your text with the Type Mask
Tool. You will want to make your type fairly large and
thick. Mine is set to 150 points.
11. Go to Layer>New>Layer Via Copy.
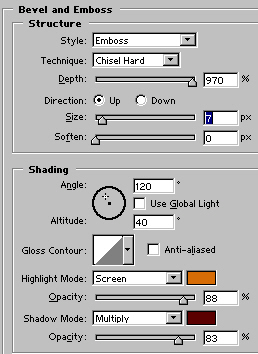
12. Apply a bevel with the following
settings:
13. Command/CTRL+ Click Layer 2 to bring up
your type selection. Contract the selection by 10 pixels.
14. Again, go to Layer>New>Layer Via Copy.
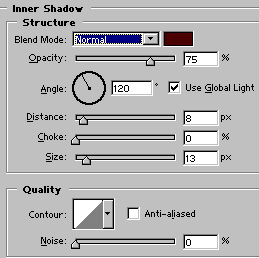
15. Remove the bevel from this layer, and
instead apply an inner shadow.
16. Time to get crazy! Duplicate this layer.
Create a new layer below it, select the duplicate again and
Coomand/CTRL+E to merge them together. Set the merged layer
to overlay, and drop the opacity to 50%.
17. Select Layer 3 again. Select the burn
tool with a feathered brush. Not too large� I'm using a 27.
Color the inlayed text, though do not thouroghly cover it
with the tool. Just give the illusion that heat had been
applied to the wood at one time or another.

18. You can now go back to the original
woodgrain layer and apply some burn there. Keep in mind that
the more you drag the burn tool across an area, the darker
the burn will appear! Try using some different brushes also�
the natural set works well for this work.
Here's where Eye Candy 4000 will come in
handy. Remember that top layer we set to overlay? If you
have Eye Candy 4000, apply some smoke to this layer.
Just for fun, make your original type layer
active. Select Inverse, and then click on the original wood
grain layer. Go to Brightness/Contrast and make the image
darker, then go to Hue/Saturation and reduce the saturation.

For those of you on your way to Photoshop
World, have a great time. For the rest of you, come visit me
at Action Fx (http://actionfx.com), and download some of the
new goodies.
|