|
Creating Glass Text.
Here is a tutorial that will show you the easiest way to
create glass text in Photoshop 6 using layer styles.

1, Start with a background. 72dpi and RGB mode.

2, Add some text, here I used galant
(www.1001freefonts.com)

3, Add a layer style by clicking the little "f" at the bottom of the layers
pallette.
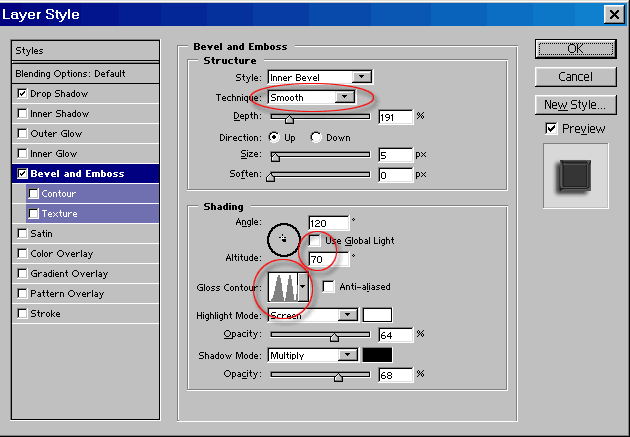
Add a dropshadow and a bevel, copy the settings shown here.
Note 2: things here that really make the glass "pop"
a. Change the contour, this gives the reflected look.
b. uncheck the global light and change the altitude to 70.
4, Here is the result, pretty uninspiring huh?

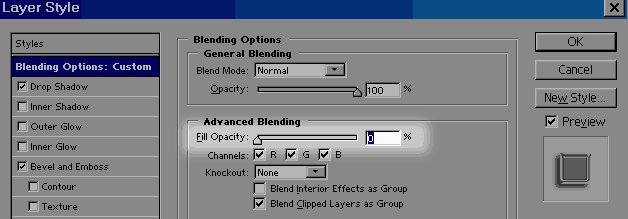
5, This step is where the magic happens!
In the styles palette, click on the Custom blending options.
Now pull the fill opacity all the way to 0 and the rabbit comes out of the hat!
6, Here is our glass type.
7, Here I copied the layer style to the background layer to make that glass too.

|