Intro to the Patch Tool
The patch tool operates on a
premise similar to the clone tool, but with patch you can
actually make a selection of an area to use as your patch,
and drag it to the area to be corrected. When you make your
selection you can then adjust the feather and so forth to
blend the edges a bit more seamlessly, and the patch
automatically adjusts the lighting/shading for the best
match of the area being fixed.
Ok, enough techno talk. What can this thing
really do?
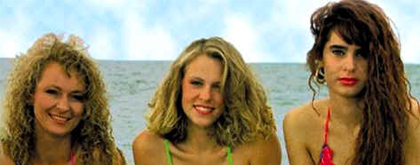
To start, let's open a picture of many faces. Here's one of
3 ladies� let's see if we can't create triplets.
Select the Patch Tool from the toolbar.

In the options bar, you will see a couple of
radial buttons that allow you to set the patch selection you
are about to make as the source or destination. Let's set it
to source for this run.

Pick a face, any face. Draw your selection
around the perimeter.

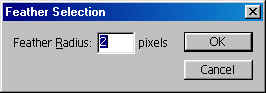
Now go to Select>Feather, and put in a
setting of 2 or so.
You should now have a selection around the
area you want to patch..

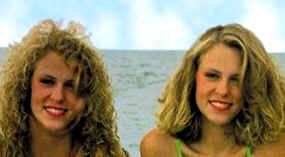
Now this part may seem a bit confusing� it
was for this old man anyway. Though we set it to source,
what actually happens is we drag the selection to another
face, and the face we dragged it to is pasted into the
original selection.
Now when we choose �destination' and drag
the selection, the face in the selection is pasted to the
new area:
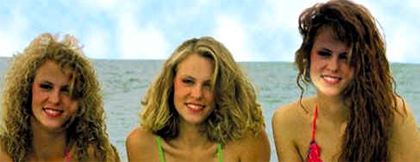
Looky there� Triplets!
|